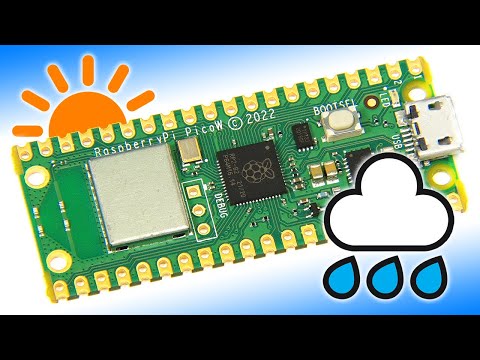
Raspberry Pi Pico W microcontroller review, plus tutorial connecting the board to a BME280 sensor module to create a wireless weather station that transmits temperature, pressure and humidity readings to a web browser.
On this web page you can find the wiring diagram and a link to the final code:
https://www.explainingcomputers.com/pi_pico_w_weather.html
The excellent Pi Pico W "getting started" instructions from the Raspberry Pi Foundation are here:
https://projects.raspberrypi.org/en/projects/get-started-pico-w
The page with links to download the MicroPython UF2 file is here:
https://www.raspberrypi.com/documentation/microcontrollers/micropython.html
The Pimoroni BME280 sensor I used in the video is available directly from Pimoroni, or on Amazon.co.uk here: https://amzn.to/3cBT4rM A compatible board is available on Amazon.com here: https://amzn.to/3PXnF1q Note that these are affiliate links, and that as an Amazon Associate I earn a commission from any qualifying purchases you may make.
If you like this video, you may also be interested in my other Pi Pico videos, including:
Raspberry Pi Pico: Inputs & Servos:
https://www.youtube.com/watch?v=TDj2kcSA-68
PicoMite: Running BASIC on a Raspberry Pi Pico:
https://www.youtube.com/watch?v=Cxmjy1nz6MM
IN CASE OF DIFFICULTIES:
If during your experimentation you end up with a Pi Pico W that executes a program that you cannot interrupt by pressing Ctrl-C or Ctrl-F2 in Thonny, you can return the board to its factory state by holding down the boot select switch, connecting to a PC, and copying over a special UF2 file to reset the flash. You can find a link to this UF2 file at the bottom of this page:
https://www.raspberrypi.com/documentation/microcontrollers/raspberry-pi-pico.html
Note that after execution you will have to reinstall MicroPython and any required libraries, such as the one for the BME280. All programs will also be erased! Hence, during program development, it is wise to save a copy to both the Pico W and to the PC you are working on.
For additional ExplainingComputers videos and other content, you can become a channel member here:
https://www.youtube.com/channel/UCbiGcwDWZjz05njNPrJU7jA/join
More videos on computing and related topics can be found at http://www.youtube.com/explainingcomputers
You may also like my ExplainingTheFuture channel at: http://www.youtube.com/explainingthefuture
Chapters:
00:44 Pico + Wireless
02:37 MicroPython & Thonny
06:23 BME280 (Sensor)
08:13 Reading the Sensor
11:26 Final Code
15:13 Remote Test
16:23 Wrap
#RaspberryPicoW #PicoW #BME280 #ExplainingComputers
What an exceptional upload. This is exactly what I need to set up remote monitoring of a fridge for my wife's new cake business.
Can anyone tell me if there is a way of periodically updating an Excel spreadsheet with temperature readings once every 6 hours???
@PositivityInfinite Says:
Very cool
@bluppprint Says:
How can you connect a small oled screen to it?
@DavidCampos-ri1np Says:
Hi Great video. Just what I'm looking for. New to Pico but done the same with arduino R4 wifi. Problem ... Micropython BME280 not listed in Thonny.
I have a AHT20 but can't find a working lib for that either. Any ideas?
@zebcode Says:
Great video, simple easy to follow code too. I realise that this is just for demonstration purposes. Could be interesting to make it return JSON instead of HTML. I wonder how the updating is happening... old school meta refresh? Or modern server sent events?
I want to make a wifi enabled furo for japanese urushi laquering. Humidity needs to be carefully controlled.
@BritishBeachcomber Says:
Is there a version of the sensor that does rainfall, wind speed and wind direction?
@stepansticha Says:
Hovno, Miro Žbirka pořád žije 👀
@DavidRoberts-u3v Says:
Firstly will a bmp280 work with the weather station project? Secondly can you share the actual code for the project?
@thebarneylejeune Says:
I love your videos and learn a lot from them. I am trying to read the temperature from two different BME280s and post them to the Pico hosted website, but I am having difficulty. Can you suggest how I would publish the readings from two BME280s to the website?
@Barbarossa_67 Says:
I built this and it works well (after some frustration with a faulty bme280 board). One hint that will save a lot of frustration - don’t name the program ‘main.py’ until it is debugged if it gets stuck in a loop there might not be a way of breaking out without wiping the flash drive.
A follow-up could be making the web server run asynchronously so that the pico can do other things like logging data to a file.
@DavidRoberts-u3v Says:
Can I get the actual code from you for this project?
@tonywalker8250 Says:
Excellent, thankyou.
@desteban3uluaga Says:
That's an awesome and thoroughly explained tutorial. Thank you for sharing your wisdom!!!
@marekgryglicki2631 Says:
fajne. dziękuję
@wizzardrincewind9458 Says:
👍🖖
@tonyweavers_M0SHG Says:
It works! Thanks for another great video Christopher. I had a couple of hiccups, I named the file main.pi instead of main.py. Schoolboy error!
@jean-claudejacquet7824 Says:
Thank a lot for your video, but I would like to know a easy solution for read these values when I have outside of my home. Could you explained how send this web page to one external server ?
@stylistic007 Says:
You are a fantastic teacher! Thank you from someone who knows nothing about programming.
@antoniopiconrodriguez554 Says:
Hi!! Congrats!! It would be possible to develop a weather station in a Raspberry 4B where It IS running Open Media Vault? Maybe as a docker compose? Anda it must be wireless. Thanks!!
@seasonedtoker Says:
It is totally silly that every project I get into wit pico or rpi, Christopher has already done it, and to make matters more interesting, he actually gets his project to a point of same complexity that I am interested in, like sensor data shown on oled display, etc. Thank you for your videos, Christopher
@przemeko Says:
GreatScott !
@kerbalette156 Says:
Dunno why but I always get BBC tomorrow’s world vibes when I watch you
@allstar7778 Says:
do we really need to use that white board on which you soldered the pi pcb ? can't the sensor directly connect on pi board without using any white board ?
@rongeernaert1208 Says:
Thanks for BME280 info, and I go to put a selfmade tipping bucket for rain messure !🤠
@arniep740 Says:
Thank you for this video. I enjoy all of your videos. I did get this one to work. However, I was wondering if there is a simple way of displaying each datum on a separate line on the webpage? I am pretty ignorant about how to format data on a webpage. Thank you and I hope to hear from you about this!
Cheers!
@micgent Says:
I feel like im back in the classroom, only this time I want to learn. Thank you for the great content. Now im off to integrate this into my Home Assistant.
@damienduddy3096 Says:
I started building my own just before this video came out. I had been meaning to update it as it was a prototype. It was a Pi Zero W connected to a 12v 7ah lead-acid battery and using OpenPyXL to record the values. I have finally finished the project by changing it to running on a Pico W, using Powerboost 1000c from Adafruit and a 4000mAh LiPo connected to 2 6-volt solar panels. I might upgrade it again once I acquire a Pico 2, as it draws less power. However, I want to finish the backlog of other projects before buying anything new. Thank you so much for this video, Chris! Yours is one my absolute favourites on Youtube! Looking forward to seeing a video on Pico 2!
@davids9139 Says:
I was just curious how these little boards work...watched this video....now I'm like "shut up and take my money!" Thank You for this video!
@GenesCustoms. Says:
That is cool! I am not a code type guy, but I am interested in building a DIY Raspberry Pi5 weather station. along with my SkyCam I set up. Wish me luck.
@teobenedict1733 Says:
Easy to understand and a great introduction to the raspberry pi pico w! Will be great if you can show us how to activate a fan when a certain temperature has been reach.
@TraceHadfield Says:
I like your channel thanks! I tried the pico w weatherstation, but got an error trying to install the bme280 package. While trying to search, it gave the Error code: Any suggestions? Thanks.
@patrickrobinson317 Says:
When the Pico was connected directly to your computer the IP was 192.168.1.109.
It was easy to see the IP Number on the screen at that point. 😊
After you took it outside it changed to 192.168.1.106.
So, how did you determine what the new IP number was without having a screen attached to the Pico ? 😊
Thanks in advance for your reply !!!
@JeremyDWilliamsOfficial Says:
I have watched MANY tech videos. You are EXTREMELY good at making these kinds of videos.
They are to the point, clear, cover the important parts without going down rabbit holes - and best of all, provide quality resources that actually help.
Please keep it up! And if you arent already covering this topic and are very brave, consider ROS2 tutorials (without using containers).
Thanks again. Subbed. (I’ve seen your work before but have no clue why I wasn’t subbed already. I just assumed I was already as you’re that good!)
@jwaddin Says:
Amazing job! Thanks for sharing! ❤
@diodeskies9087 Says:
Fantastic thank you
@danandnancystone5530 Says:
I have imported the module micropython_bme280. When I run the code, I get this error:
Traceback (most recent call last):
File "", line 4, in
ImportError: no module named 'bme280'
How can I fix this?
@davetelling Says:
micropython-bme280 will not install in Thonny. I keep getting an error saying that it does not appear to be a python project. "bme280" (with the micropython-) installs OK, but obviously is not the one to use. I'm totally new at this, and am not sure what to do at this point.
@shipbl1 Says:
Could this project be possible on a pi3 a+, as I already have one laying around? Cheers
@davetelling Says:
This is so freakin' cool! I'm going to have to try it!
@graxxor Says:
Your channel reminds me of those old BBC coding programmes that they used to show when I was a kid... Filling our heads with fancy ideas, sparking our imaginations and above all showing us that this arcane magic was within our very grasps if we just pushed our envelopes a bit and tried something new.
I honestly feel that the Pico W is now where the original RPi intended to be... with the added benefit of wifi!
@daverich3352 Says:
You have the same presentation style they used on Tomorrow's world in the 1980s.
@jamiroquaiordie Says:
thank you Carlos Balá for all your knowledge
@DiegoSandoval-cs5oo Says:
What kind of solder do you recommend for a beginner? Leaded or Lead-free? What's more safe?
@adrift4days Says:
Extremely grateful for your work - so glad that I stumbled upon your channel, exactly what I was looking for.
@Johan7188 Says:
I've followed the video, connected the devised and copied the code. When trying to run the code I get the following error "AttributionError: 'module' object has no attribute 'BME280'". How do I resolve this error? Thank you.
@thespacecowboy420 Says:
Wow you actually used a BME280... because this is Rpi and not garb-o arduino... so you can't easily use garb-o sensors. Nice.
@juleshorne8580 Says:
Great video! Super clear and encouraging
@Yakroo108 Says:
👍👍👍
@peters6601 Says:
After much head scratching have managed to get this interesting project working late 2023! Since this video was made the Pi OS has become 'Bookworm', the only way I could get it to work for me was to use all software that is pre May '23. Was not straightforward, which is good as I learnt something.😁


LATEST COMMENTS